Flush
There are two flush modes -
1) Auto
2) Commit
Auto flush is the default which flushes [persists] the entities in the persistence context at the transaction commit time and also on every query executed with in a transaction. Exception to this is find() because if we want to find an entity which is modified then the find will return back the entity that is present in the persistence context. But if we execute a query then query doesnt return the whole entity but returns some fields as a list and this is the reason that thepersistence context is flushed during query execution.
Commit mode will flush the persistence context when the transaction commits.
We can force flush by calling the flush method on the entity manager to flush the persistence context.
Persist and Merge
Merge can persist but persist cannot merge.
When an entity is persisted and before even the transaction is not commited, we can get the primary key if the primary key is autogenerated using table strategy.
Showing posts with label JEE ShoppingCart Example. Show all posts
Showing posts with label JEE ShoppingCart Example. Show all posts
Sunday, February 28, 2010
Persistence Context and Entity Manager
Persistence Context is nothing but a bag that holds entities. Entity Manager contains persistence context and manages [creates, updates, deletes] the entities that are part of that persistence context. This is shown in the following figure

The life cycle of persistence context depends on whether it is transaction-scoped or extended persistence context.
Transaction-Scoped Persistence Context -
Transaction begins when the bean method is invoked and it ends when the method returns or completes. Similarly transaction-scoped persistence context follows the transaction and is created when the transaction begins and ends after the transaction commits or rolls back.

Extended Persistence Context -
This type of Persistence Context is independent of transaction i.e., the creation or destruction of persistence context is not dependent on transaction begin or transaction end as in the case of transaction-scoped persistence context. Persistence Context will be created when the statefull session bean is created and it is destroyed when the stateful session bean is destroyed.

Note:
There can be many instances of Entity Manager referring to the same single instance of persistence context if all these entity managers are part of the same transaction i.e., entity manager instances part of different ejb's invoked by an ejb which starts and ends the transaction. Please refer the picture below -

Sunday, November 22, 2009
Managing User Preferences - Personalize the User Space
Managing User Preferences
User does many things once he logins into the application to personalize his space.
Some of the many things will be setting the window sizes, positioning the windows, hiding or showing widgets etc etc.
Here I will briefly go through how to manage user preferences in ext js.
Initialize the state provider
Ext.state.Manager.setProvider(new HttpProvider());
In this case we are initializing the manager with the Http state provider persisting the state to the database.
Initialize the scheduler
Scheduler in this case will schedule the task for persisting the state to the database.
delayedTask = new Ext.util.DelayedTask(this.persistState, this);
Here DelayedTask is used as the scheduler.
Initialize the state manager
Initialize the state manager by loading any state persisted before by reading it from the database via HttpProvider.
Start the scheduler
delayedTask.delay(1000);
Here we are asking the scheduler to poll the state manager once in 1000 milli seconds to know if there are any changes in the state to be persisted.
The callback api, in this case, the persistState api will be called if there are any changes to the state.
persistState api may look like this,
function persistState() {
if(!stateDirty) {
delayedTask.delay(1000); // If state not dirty delay the scheduler for 1000 milliseconds more
}
delayedTask.cancel(); // stop the scheduler and submit the state to the server asking it to persist to the database.
submitState();
}
Override the set method of the provider
Set method of the provider is used to set the state [user preference like window size, x & y position etc] to the state manager.
Override the set method of the Provider to set the stateDirty flag to true and start the scheduler which was cancelled when the state was submitted to the server.
stateDirty = true;
delayedTask.delay(1000);
superclass.set();
Sunday, November 15, 2009
Shopping Cart: Project set up & Login Screen
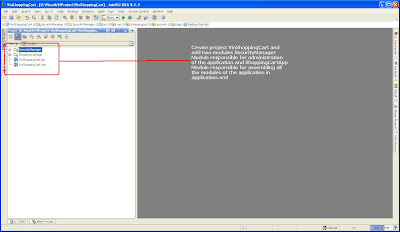
1) Create new project
Project is the collection of modules.
2) Create Modules
Module is the collection of facets.
3) There are lots of facets but 4 facets are quiet important to make a note of
Web, EJB, JPA and JEE facets.

4) Write a web.xml for your application in the web facet.

5) Configure an authenticator valve in context.xml

6) Write a redirect servlet
7) Mention about the module in application.xml

8) Configure JBoss from the ide.


9) Compile the application, deploy and run jboss.
How does it all work
When the user points the browser to localhost:8080/shoppingcart for the first time, the jboss server figures out from the web.xml configuration that this resource cannot be accessed publicly by everyone and that it needs to be secured and only allowed roles can access it. To authenticate the jboss server will use the FormAuthenticator which is configured as the valve in context.xml. The FormAuthenticator will interpret the request and changes the url to the one mentioned in web.xml, in this case it is /unsecured/login and redirects to RedirectServlet. The RedirectServlet will dispatch the request to Login.jsp and hence the Login.jsp is sent back to the browser.
Project is the collection of modules.
2) Create Modules
Module is the collection of facets.

3) There are lots of facets but 4 facets are quiet important to make a note of
Web, EJB, JPA and JEE facets.

4) Write a web.xml for your application in the web facet.

5) Configure an authenticator valve in context.xml

6) Write a redirect servlet
package com.shoppingcart.security.login;

import javax.servlet.http.HttpServlet;
import javax.servlet.http.HttpServletRequest;
import javax.servlet.http.HttpServletResponse;
import javax.servlet.ServletException;
import javax.servlet.RequestDispatcher;
import java.io.IOException;
import java.util.Enumeration;


public class RedirectServlet extends HttpServlet
{
  protected void service(HttpServletRequest httpServletRequest, HttpServletResponse httpServletResponse) throws ServletException, IOException
  {
      final String svlpath = httpServletRequest.getServletPath();
      Enumeration en = httpServletRequest.getAttributeNames();
      String actualReqPathKey = "javax.servlet.forward.servlet_path";
      String actualReqPath = (String)httpServletRequest.getAttribute(actualReqPathKey);

      String pageName = actualReqPath;

      if ("/unsecured/login".equals(svlpath)) {
          if("/index.jsp".equals(actualReqPath)) {
              pageName = "/Login.jsp";
          }
      }
      else {
          throw new ServletException("RedirectServlet: operation '" + svlpath + "' not supported!");
      }
      redirectToLogin(httpServletRequest, httpServletResponse, pageName);
  }

  private void redirectToLogin(HttpServletRequest request, HttpServletResponse response, String pageName) throws IOException, ServletException
  {
      RequestDispatcher dispatcher = this.getServletContext().getContext("/shoppingcart").getRequestDispatcher(pageName);
      if (dispatcher != null) {
          response.setContentType("text/html");
          dispatcher.include(request, response);
      }
  }

}
7) Mention about the module in application.xml

8) Configure JBoss from the ide.


9) Compile the application, deploy and run jboss.
How does it all work
When the user points the browser to localhost:8080/shoppingcart for the first time, the jboss server figures out from the web.xml configuration that this resource cannot be accessed publicly by everyone and that it needs to be secured and only allowed roles can access it. To authenticate the jboss server will use the FormAuthenticator which is configured as the valve in context.xml. The FormAuthenticator will interpret the request and changes the url to the one mentioned in web.xml, in this case it is /unsecured/login and redirects to RedirectServlet. The RedirectServlet will dispatch the request to Login.jsp and hence the Login.jsp is sent back to the browser.
Subscribe to:
Posts (Atom)